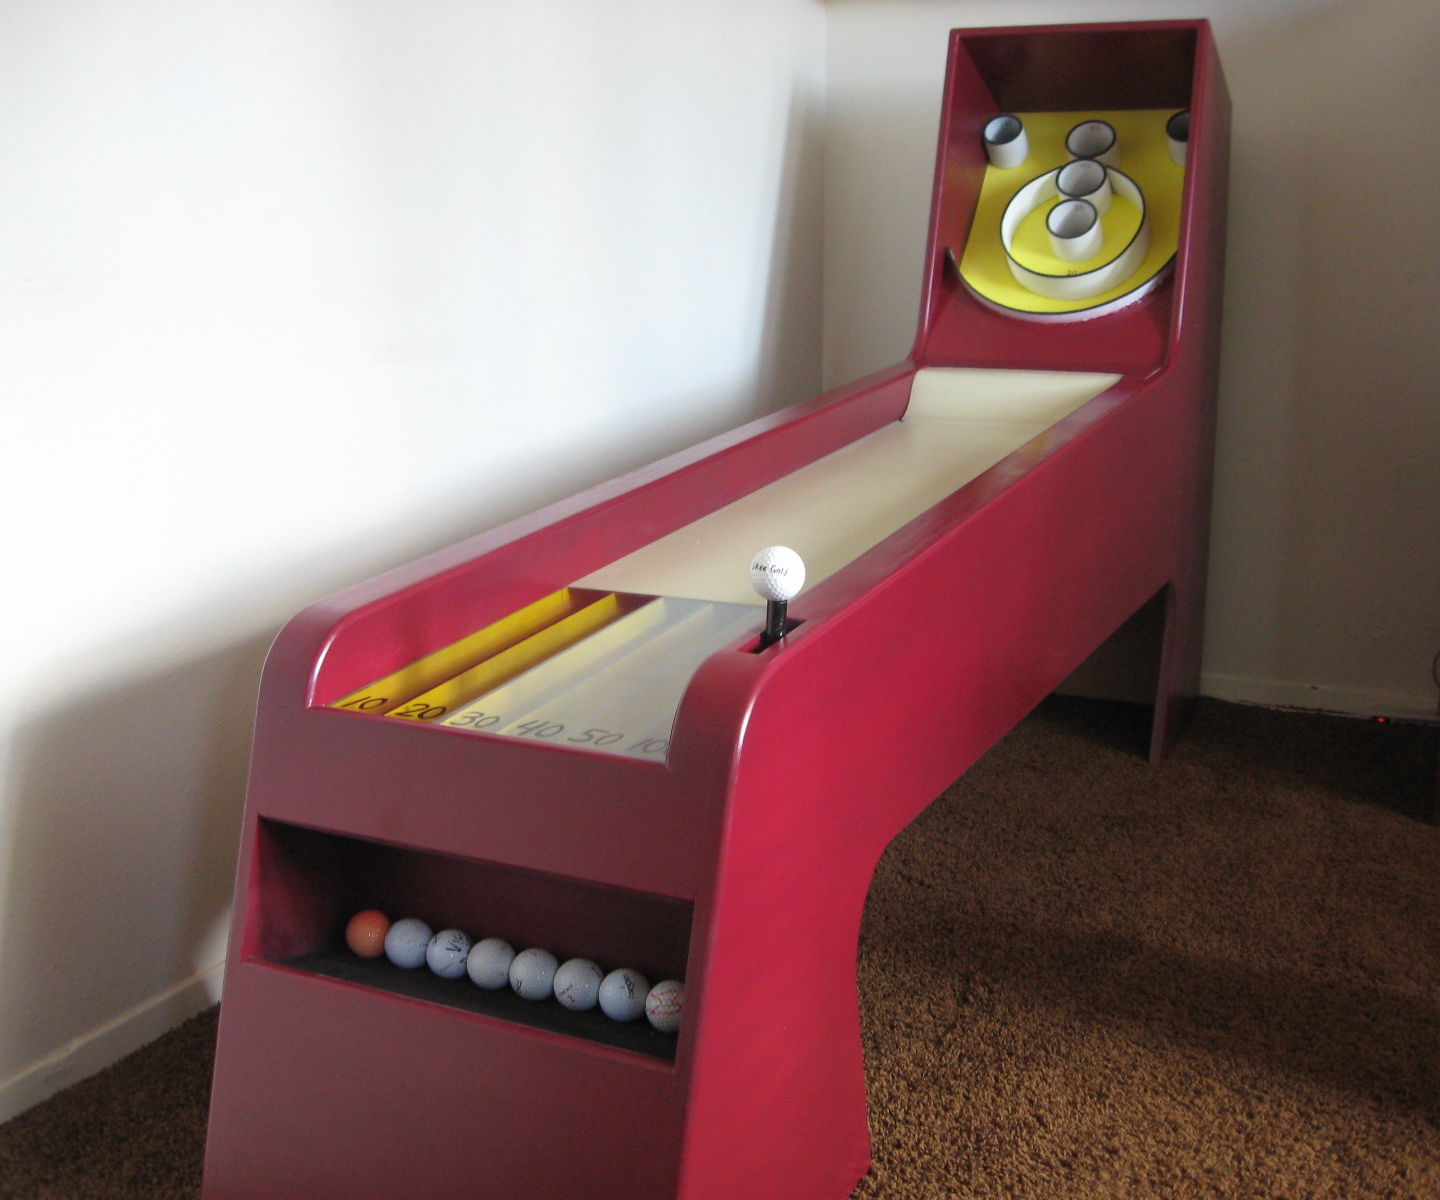
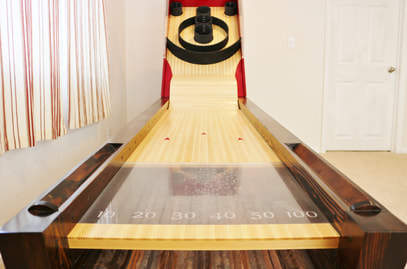
Skee-Ball is your classic arcade game. You toss the ball up the ramp to try to land it in one of the holes for points. I thought it would be neat to make one that could go in our basement along with the other games we have down their, like air hockey and shuffleboard. When I started researching different designs I took different elements out of different designs to make an original design of my own. My backboard is very similar to the picture in the middle. My ramp is a more simple version of the bottom right picture, including the piece of plexiglass. This just helps to see the my design is like others but at the same time unique.
|
|
|
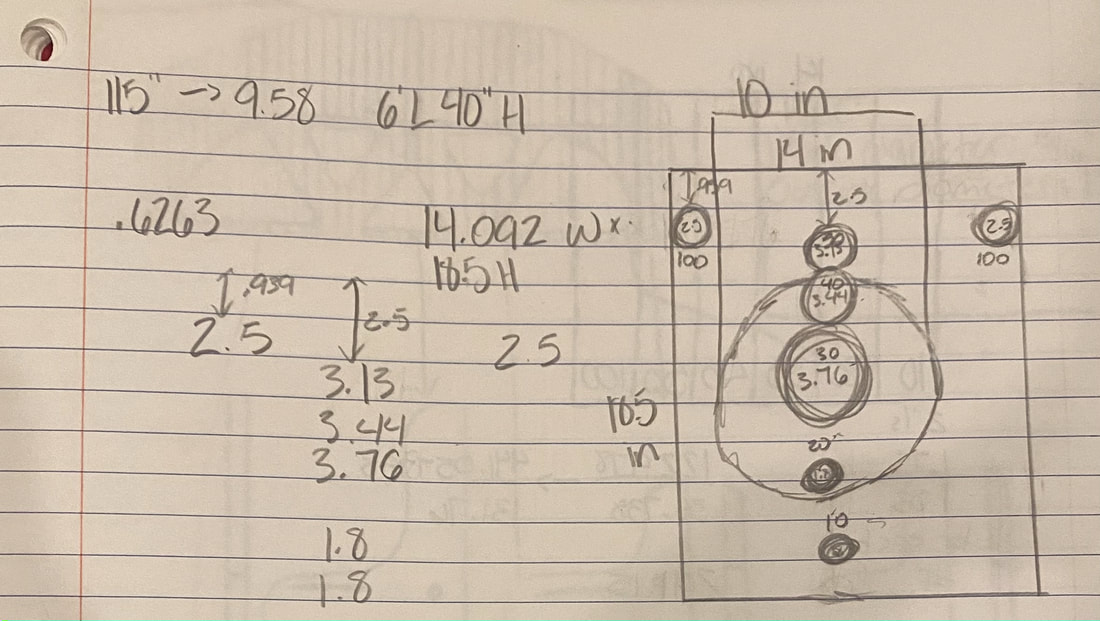
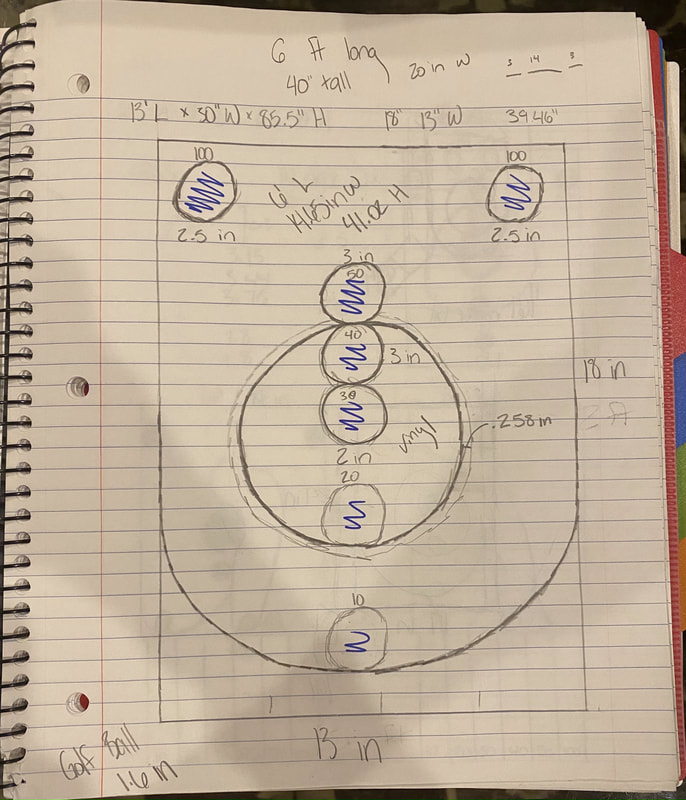
Sketches
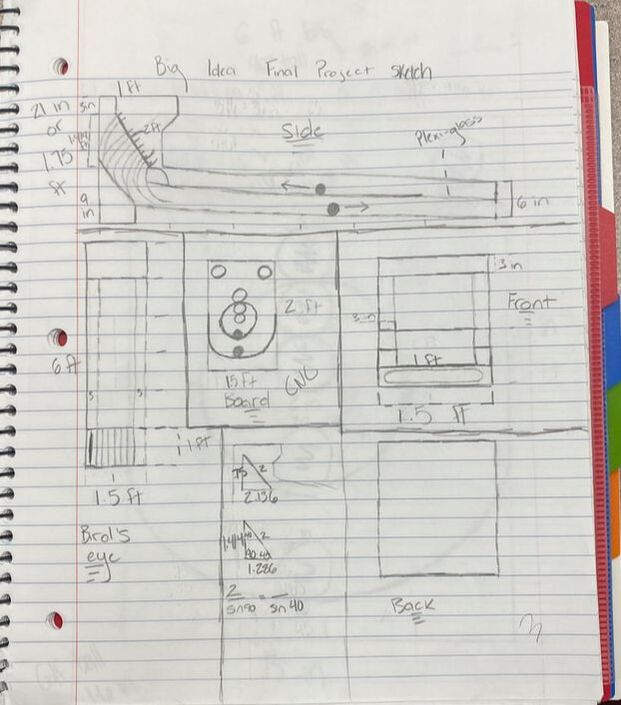
I had a lot of sketches that I drew up because they are so many different parts and pieces that go into this project. These sketches just show my initial design, so the final product in terms of dimensions will be different than the initial drawings. But going into the research part of the project it made it easier to see what the flaws of different projects other people have made to avoid doing the same thing in my own project. A couple of flaws that I found was the angle of the ramp leading from the bottom to the top of the game, the right ball, and just the overall angle as a whole.
|

|
|
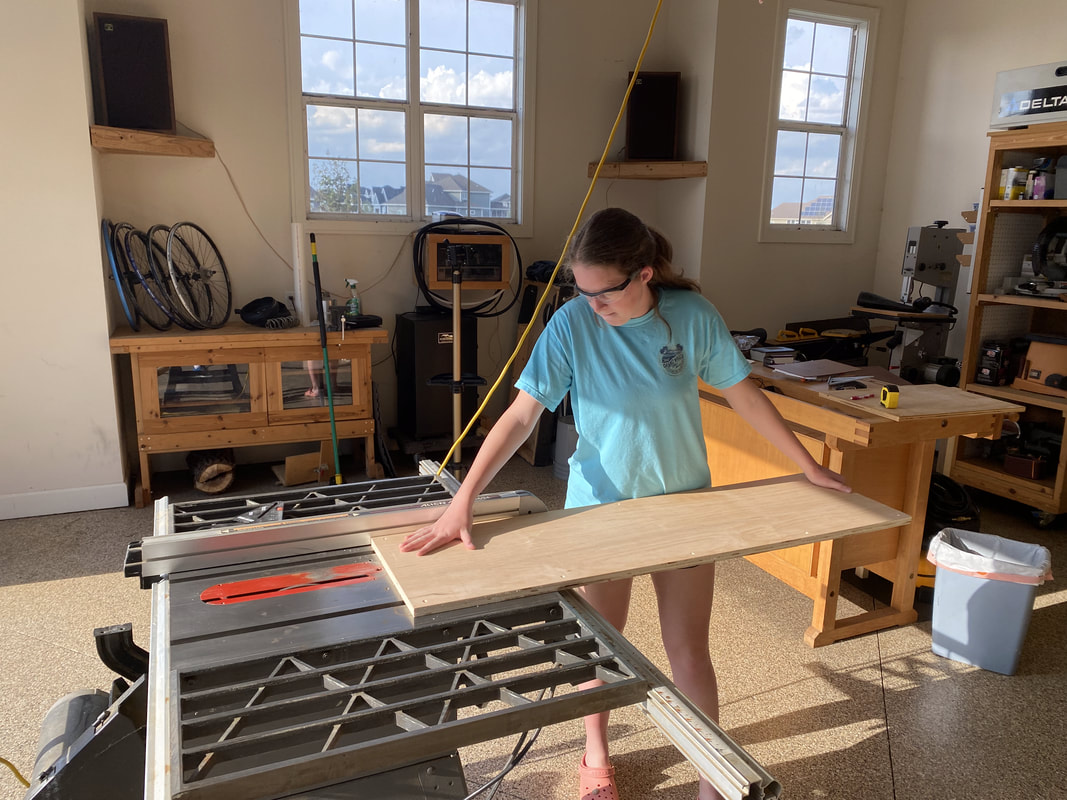
Woodworking
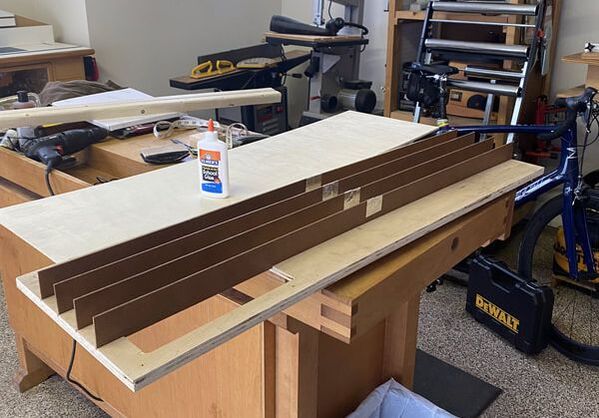
This project is pretty much all wood working. To start, we built the box that includes the incline leading to the ramp and the return for the balls. This box was pretty simple in terms of carpentry, all it is, is a piece of 3/4" plywood on top of 2x4"s that were cut to be 2" tall, then on the bottom is a piece of 1/4". When put together this box is 4'x14". Within this box is the ball return. We basically split the space inside the box into 5 different lanes, split up by 1/8" corkboard. We made the lanes by using the table saw to cut 1/8" wide channels to make it easy to slide each piece of corkboard into. This system allows the balls to roll down in their respective lanes to allow the player to see the score they got.
|
|
|

|
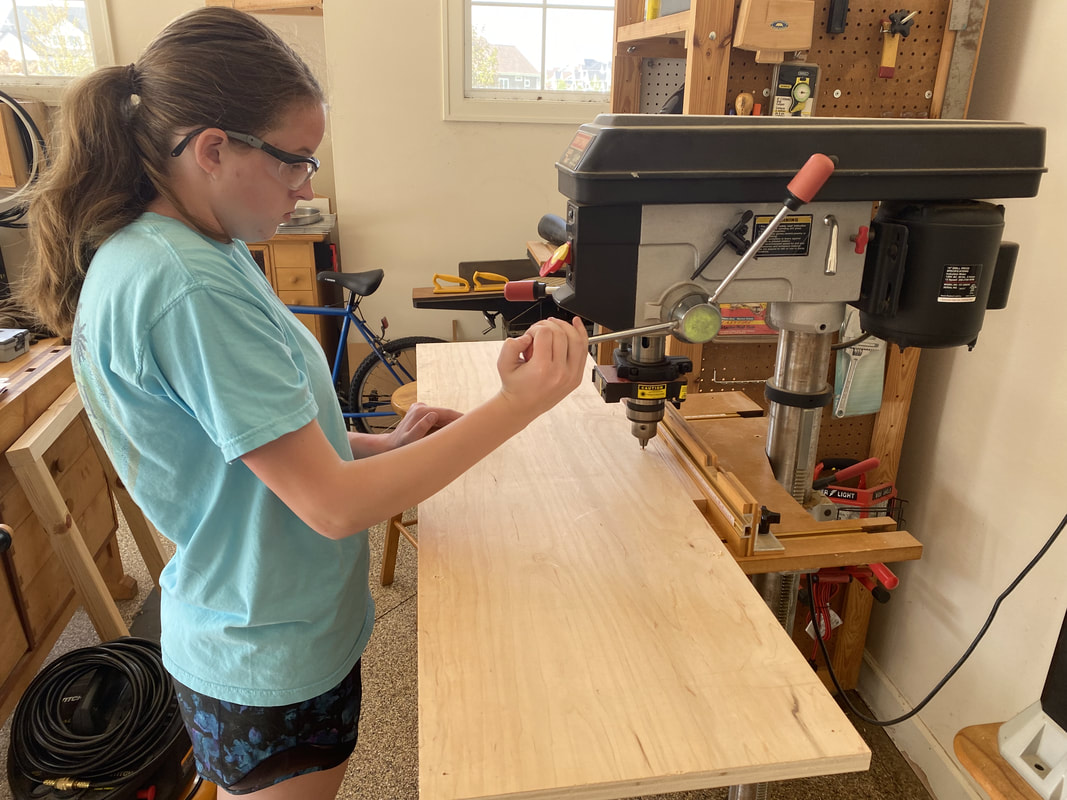
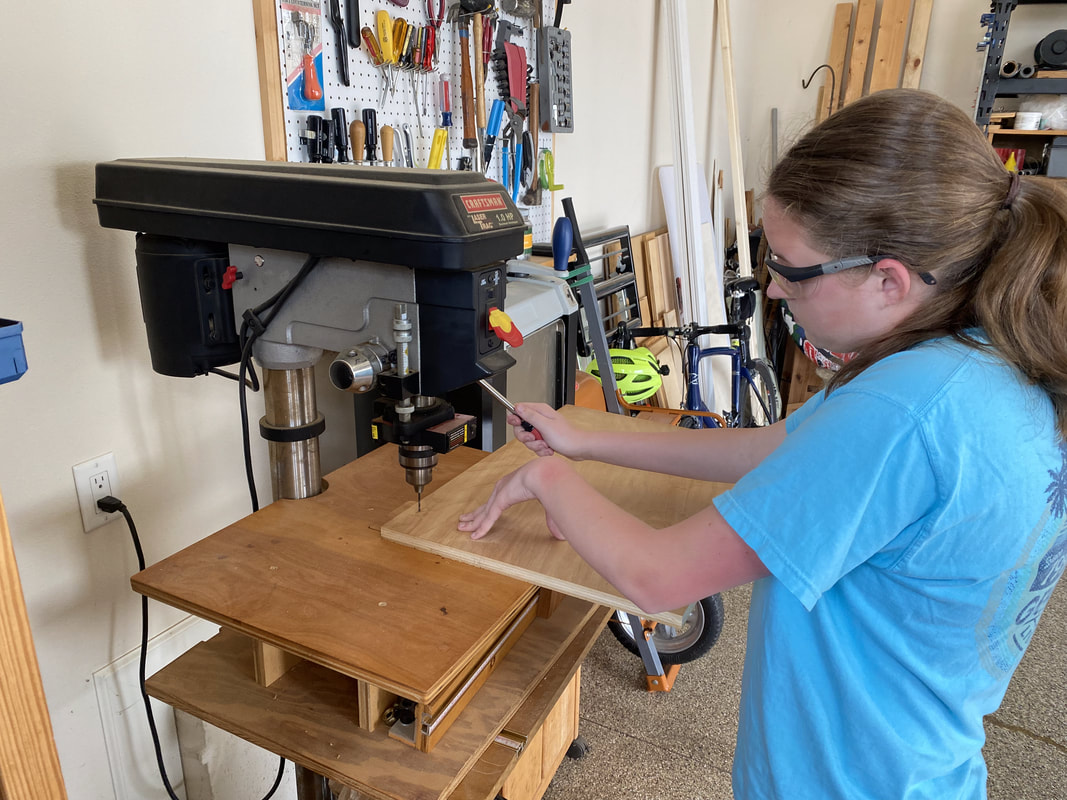
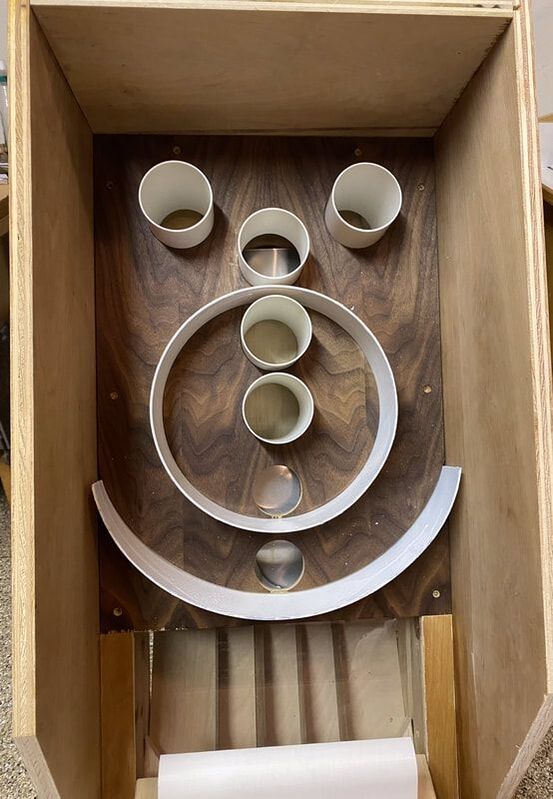
The next piece is the backboard. This includes the holes where the ball would go in to score. The way we are attaching the backboard is with 2 bolts on either side and a 2x4" frame. The frame is attached to the back of the backboard with screws. We countersunk holes into the board to allow room for the screws to fully go into the board. I used the CNC router to cut the holes but more on that later. We used basic wooden legs throughout the whole project. On the left is a picture of me making a hole for the 3" bolt that was used to attach the backboard to the ramp. On the right is picture of me using the drill press to countersink holes on the backboard piece, these holes are used to screw screws into the 2x4" frame.
|
|
Metal rails
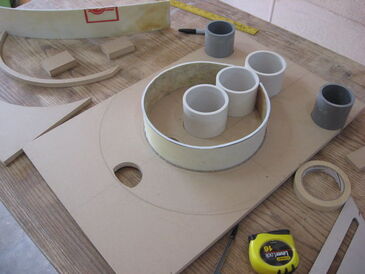
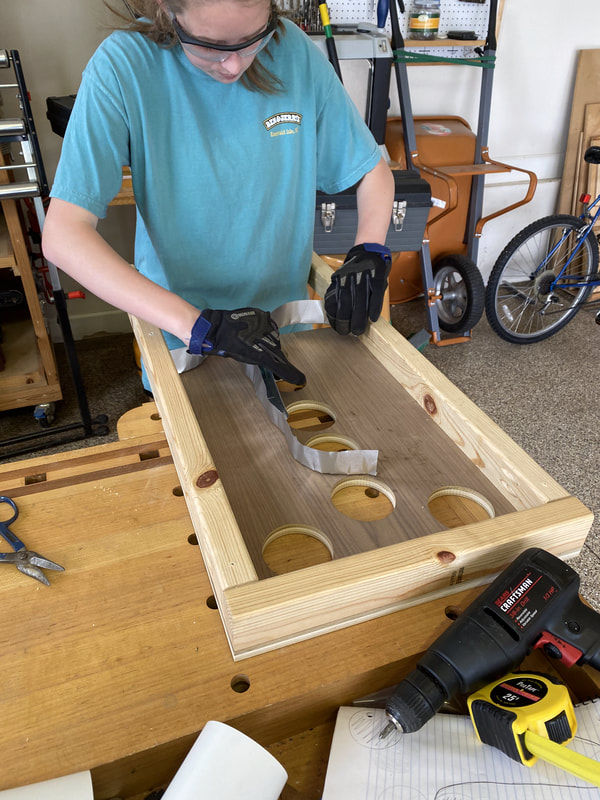
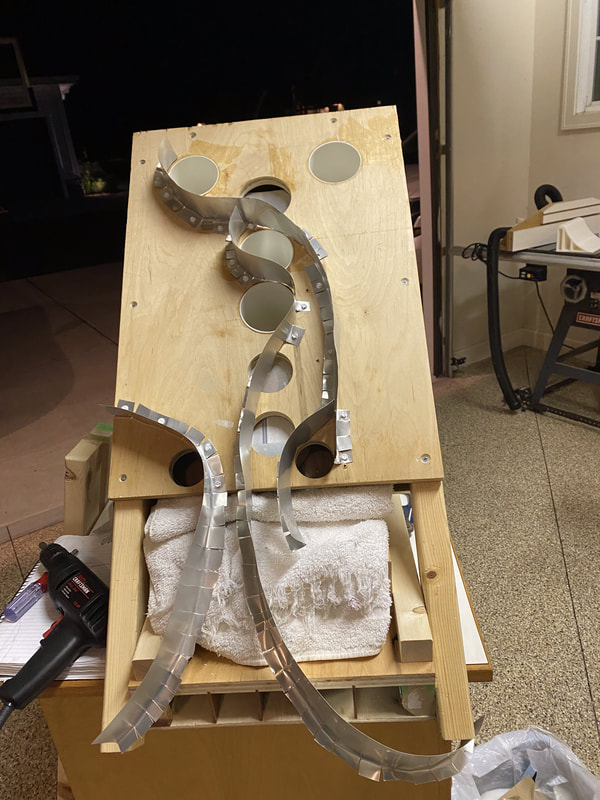
We used a roll of metal flashing to guide the balls down into the right lanes for scoring. The metal is located in between the backboard and the original piece of plywood I had, then another layer of it in between the reused plywood and another piece of 1/4" plywood. So another way to think about this "sandwich" is one of those Oreo's that has threes cookies and two layers of creme. The plywood is the Oreo cookies and the metal is the creme filling in the middle. To make it simple the metal guides each ball that goes into a hole to the right lane in terms of points. For the "cups" we used 3" PVC piping and cut up a bucket for the ring and semi-circle. We attached those pieces with appoxy.
We used a roll of metal flashing to guide the balls down into the right lanes for scoring. The metal is located in between the backboard and the original piece of plywood I had, then another layer of it in between the reused plywood and another piece of 1/4" plywood. So another way to think about this "sandwich" is one of those Oreo's that has threes cookies and two layers of creme. The plywood is the Oreo cookies and the metal is the creme filling in the middle. To make it simple the metal guides each ball that goes into a hole to the right lane in terms of points. For the "cups" we used 3" PVC piping and cut up a bucket for the ring and semi-circle. We attached those pieces with appoxy.
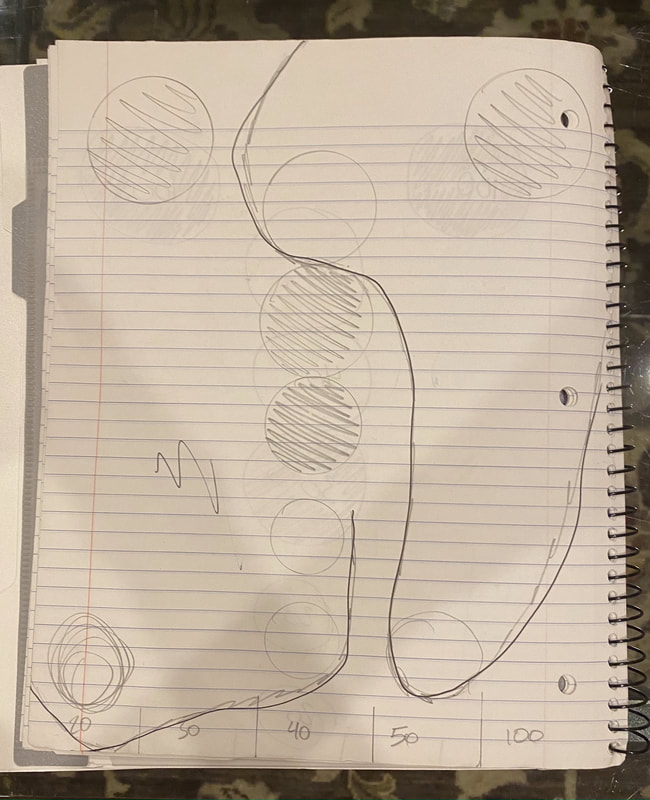
This is a sketch of the first layer. For both layers, I used a project from Instructables to help.
|
This is a sketch of the bottom layer. I made a minor mistake with the layout, in result the lanes are in the opposite order.
|
In this picture I am just looking at my sketch an trying to copy that on the first layer. These were really helpful.
|
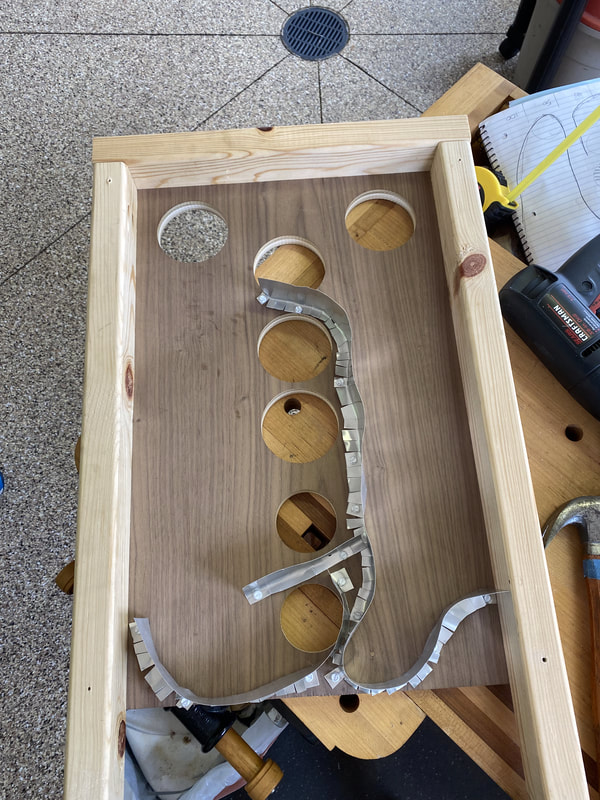
This is a picture of the first layer. Four of the seven holes don't use the first layer at all.
|
This is a finished picture of the second/bottom layer. We later trimmed off the unneeded metal after we were done.
|

This picture gives you a better idea of how the back of the game was put together. The metal is visible in the middle.
|
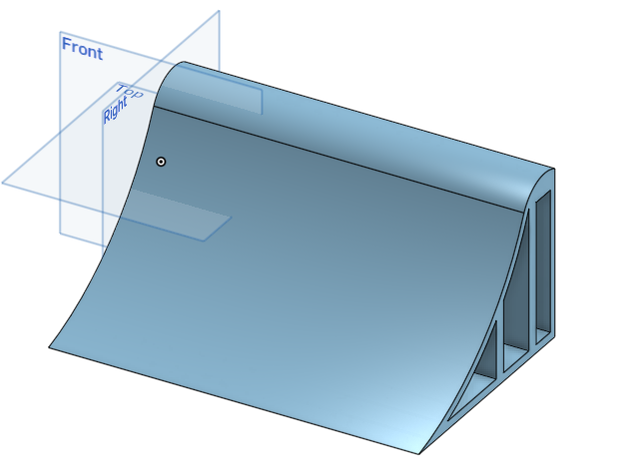
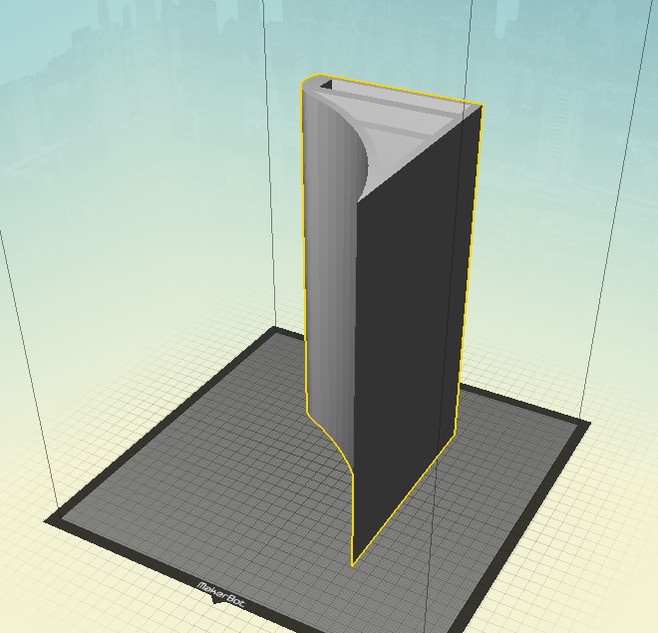
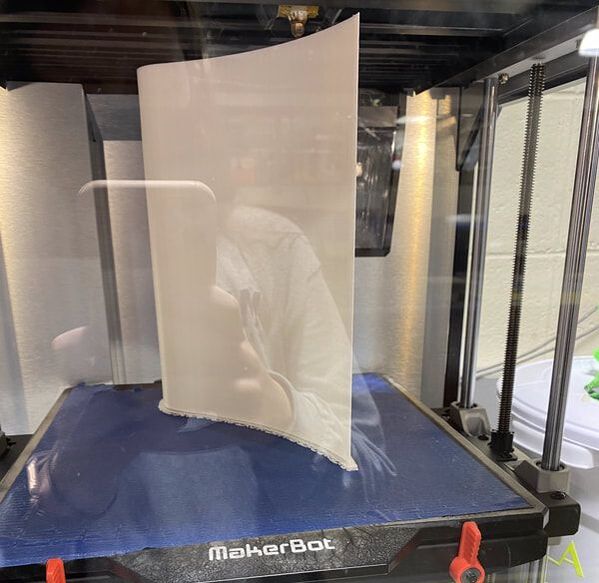
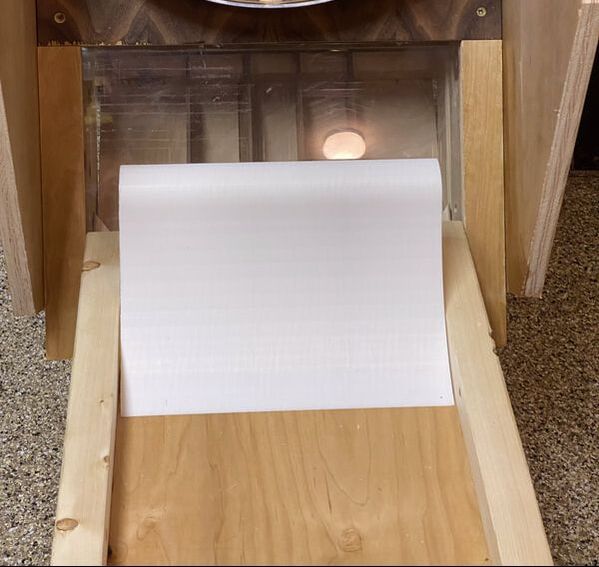
3D Printer: Ball Jump
I used the 3D printer to print the ball jump. This gives the balls the angle they need to reach the backboard. This was a huge time saver for my project because if I didn't go this route with the ramp we would have had to cut out many pieces of wood to make up the ball jump. This would have been very time consuming and taken lot of effort to make all of the pieces the same.
|
Sketches and Onshape file
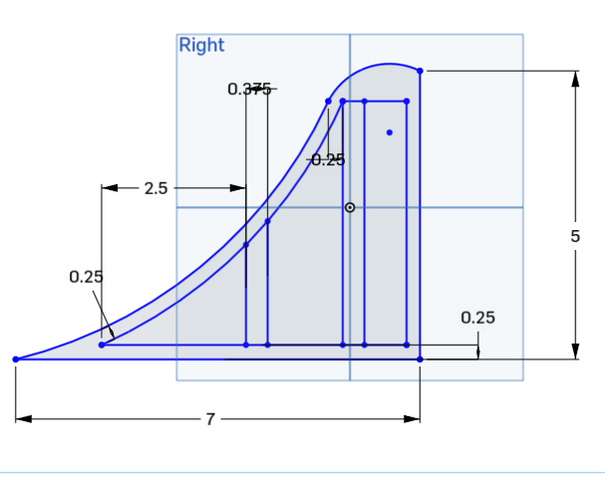
I really didn't have any specific sketches of this specific piece of my project because I wasn't using any exact angles. I was playing around with different angles in Onshape and found a good solution that way. I did measure the ramp however to figure out the best length and width to ensure a good outcome when a ball is rolled up it. |
|
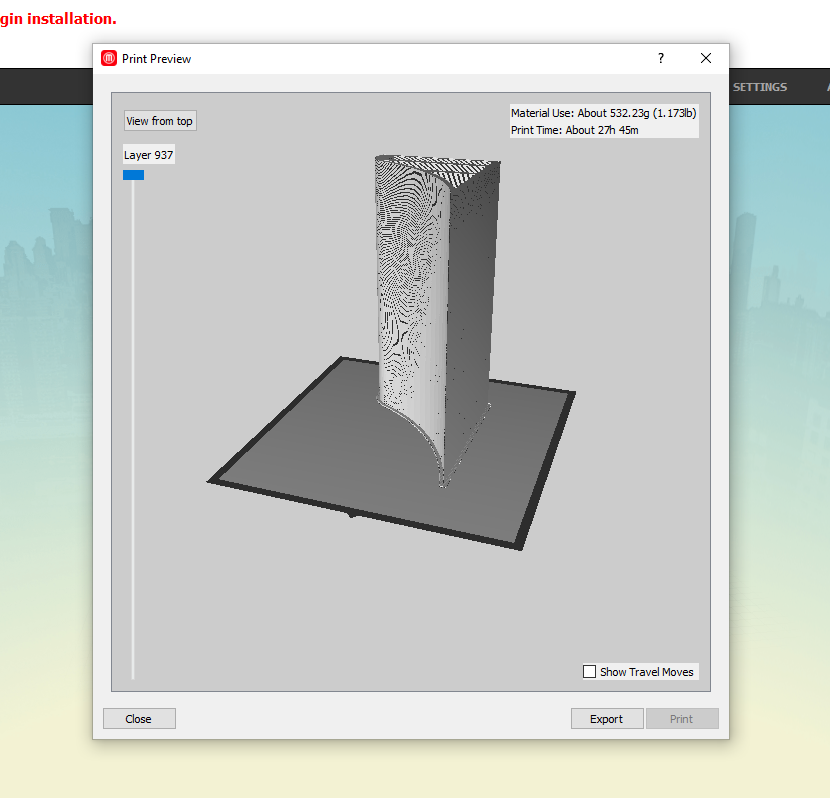
Makerbot and printer
This piece of my project was very easy to complete especially after dealing with my bench for so long. There were no supports needed but the one different thing about it was that it needed to be printed in the Z18 because it's 14" long or tall when its on its side in the printer.
This piece of my project was very easy to complete especially after dealing with my bench for so long. There were no supports needed but the one different thing about it was that it needed to be printed in the Z18 because it's 14" long or tall when its on its side in the printer.
|
|
|
|
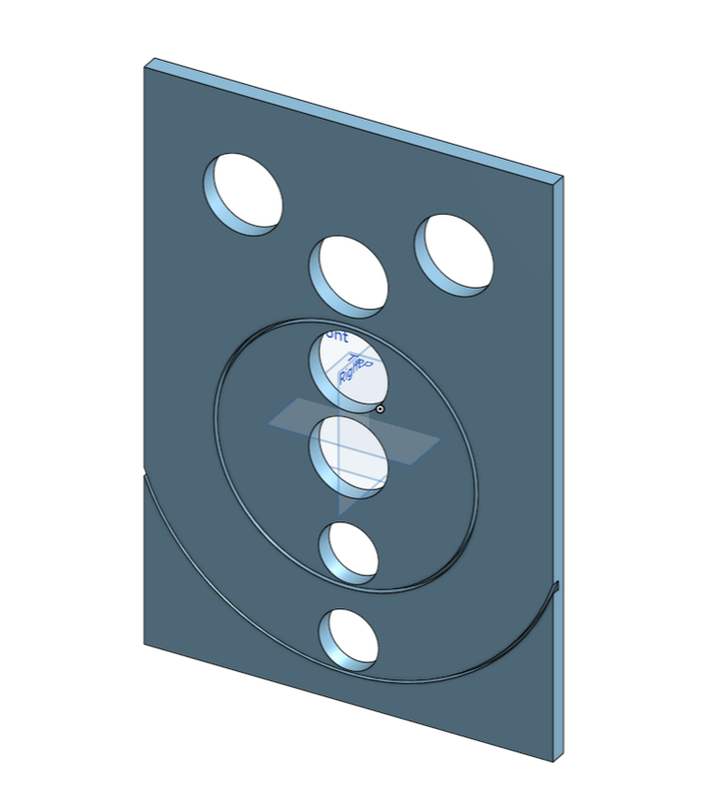
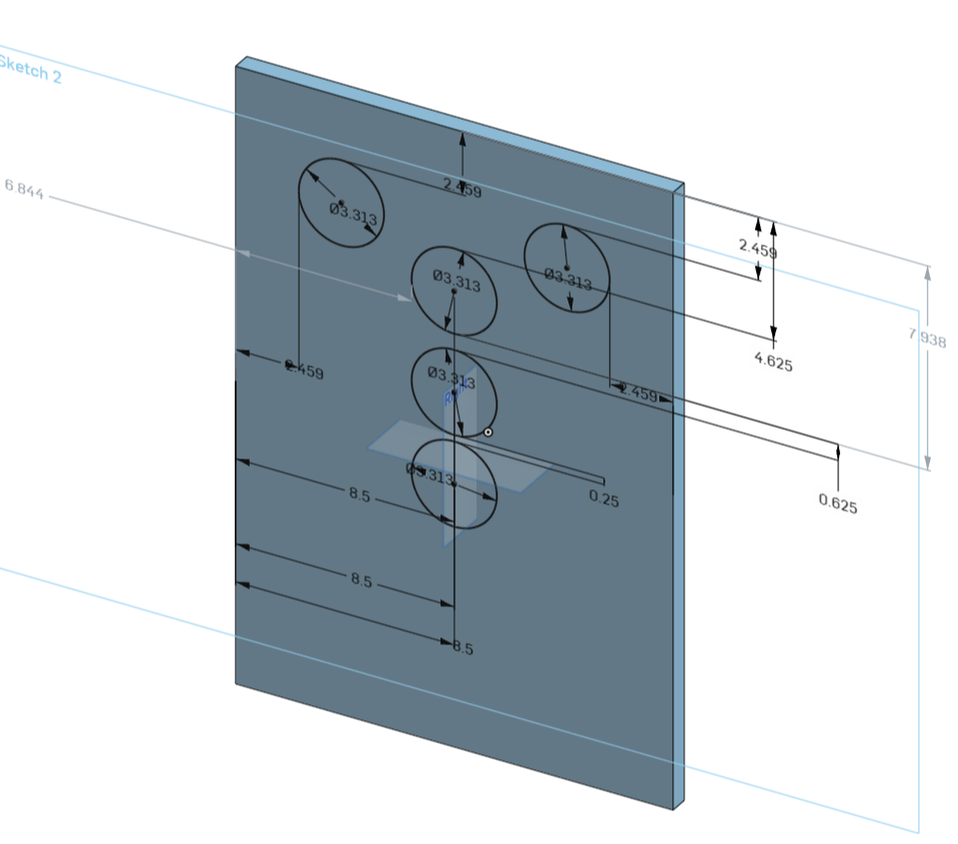
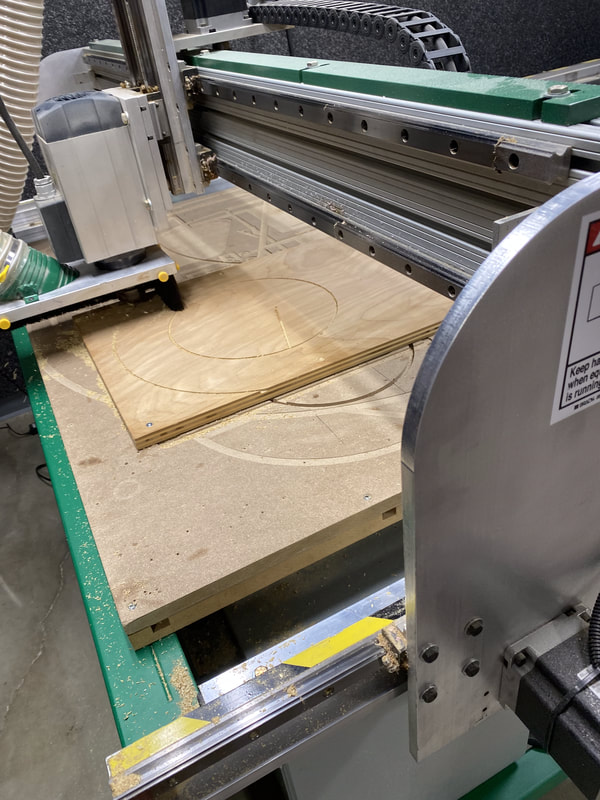
CNC Router: Backboard
I used the router to cut the holes on the backboard. This method was a really clean way of cutting these since they are visible to the outside. The design started out as a sketch, then I put together a file in Onshape. After the design was set in stone we transferred it over to Fusion 360, and from there to the router.
|
|
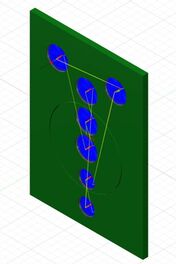
Sketches and Onshape file
My sketches allowed me to see about how much room I had to work with and then allowed me to get exact measurements down in Onshape. |
|
|
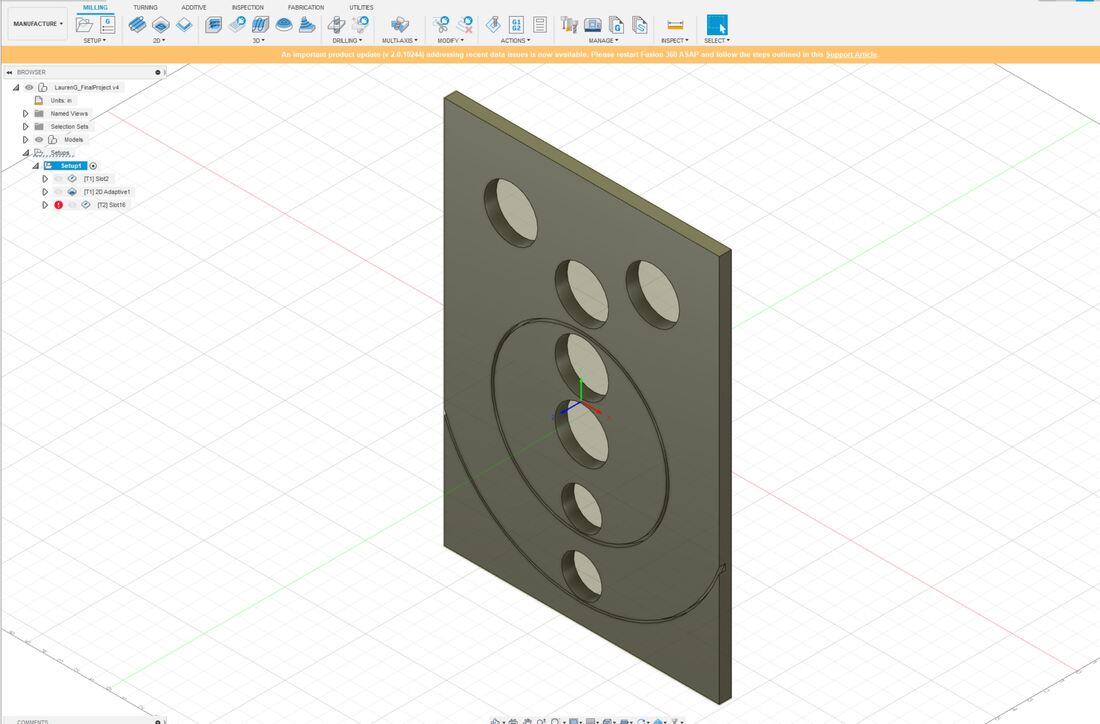
Fusion 360 and CNC Router
Once the file was put into Fusion 360 the next challenge was figuring out the cut paths of the router. In Fusion you have to tell the router how to cut, when we were setting up the router it was getting confused and kept giving us errors. Eventually we figured out how to get it to work and we put it the piece of wood on the router. When the router started up it dragged itself across the piece of wood and left a line. This mistake by the router left an opportunity to test to make sure everything fit. In the long wrong this situation was a good thing because it allowed me to make everything a little bit bigger in order to fit the PVC and the bucket in place. I also used the original piece of wood within the back of the back piece.
Once the file was put into Fusion 360 the next challenge was figuring out the cut paths of the router. In Fusion you have to tell the router how to cut, when we were setting up the router it was getting confused and kept giving us errors. Eventually we figured out how to get it to work and we put it the piece of wood on the router. When the router started up it dragged itself across the piece of wood and left a line. This mistake by the router left an opportunity to test to make sure everything fit. In the long wrong this situation was a good thing because it allowed me to make everything a little bit bigger in order to fit the PVC and the bucket in place. I also used the original piece of wood within the back of the back piece.
|
|

|
|
|
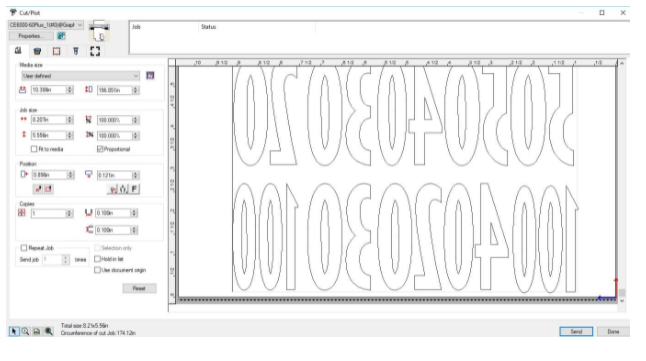
Vinyl Cutter: Numbers
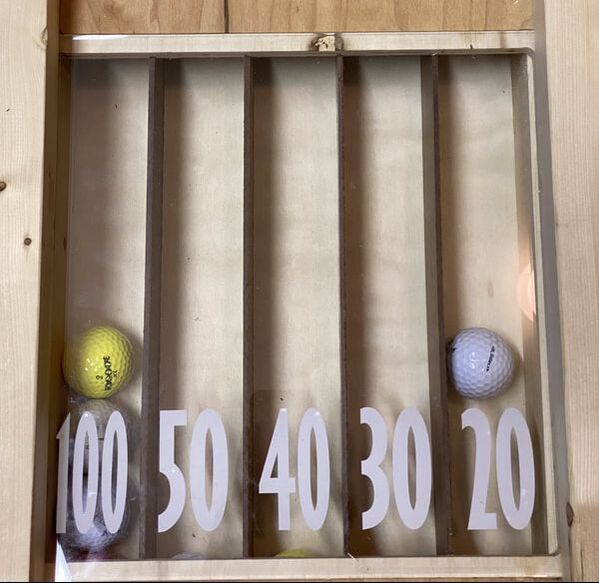
For my third and final machine I used the vinyl cutter to cut out the numbers for the plexiglass at the front of my ramp. The numbers basically label the 5 different ball lanes. That way when a ball rolls down any given lane from the backboard it is easy to tell how many points were earned from that ball.
|
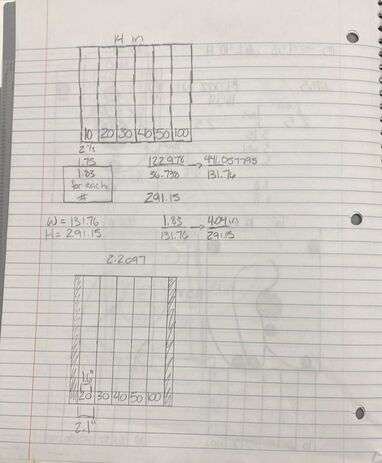
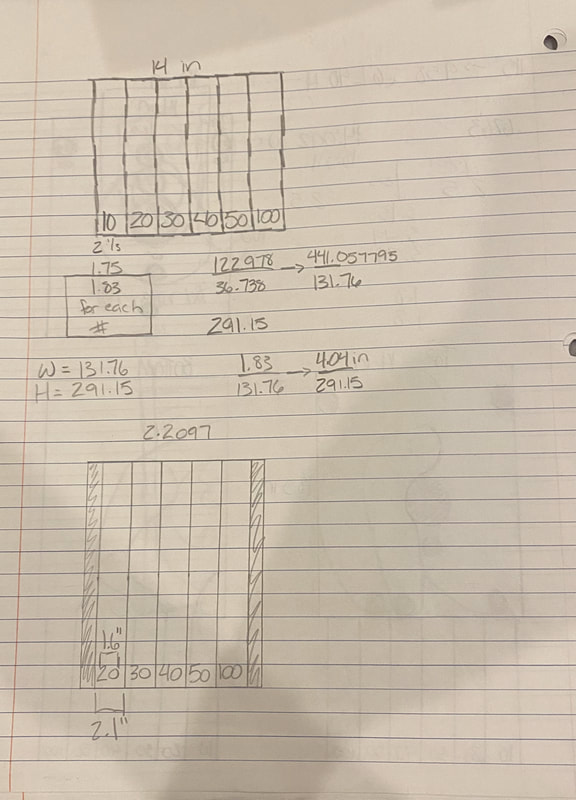
Sketch and Illustrator file
Really the only sketching I did was figuring out dimensions that would work with the lane dimensions. Once I got into Illustrator it was easy to use the text feature in there to choose a font and size for each number. The only challenge with the sizing was figuring out the point sizing for the dimensions. |
|
|
|
Vinyl cutter
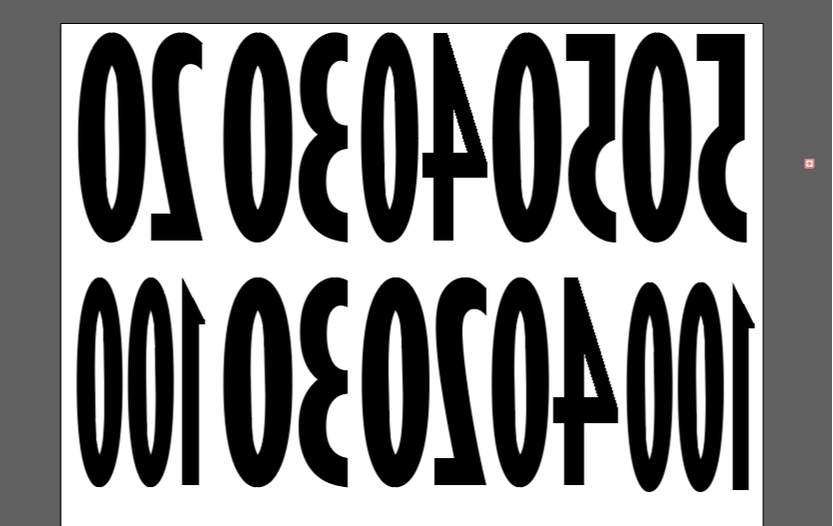
It was pretty easy to transfer the Illustrator file to the computer connected to the vinyl cutter. After the vinyl cutter was done I just had to use the vinyl tools to weed out the extra pieces. I brought them home and applied it to my plexiglass. To ensure the ramp was smooth I printed the vinyl numbers backwards so I could apply them to the underside of the plexiglass. To reference the mistake from the metal, I wanted the numbers to go 20-100 not 100-20. Overall it's fine because they are still in order but I think it would have looked a little bit better if it went from lowest to highest. |
|
Final ProductTo the right is a video of me using the skee ball game. I learned a lot about woodworking and how to use a variety of machines and tools. I also learned about time management and procrastination. I can normally procrastinate pretty well but when I need my dad to help with the tools it becomes harder because I have to work with his schedule as well. It was really interesting to see my ideas and sketches turn into an actual project in my garage.
|
|
